




Curtain and Shade Installation Guide
This guide provides general installation guidance for selected curtain and shade configurations. Hardware, dimensions, mounting methods, and safety devices vary by product. Always compare these steps with the product-specific instructions and the hardware supplied with your order.
Before drilling, confirm that the mounting surface can support the product, choose fasteners appropriate for that surface, and check for concealed wiring or pipes. Correct installation can support reliable operation, light management, privacy, and appearance, but results depend on the product, measurements, mounting surface, and installation quality. Consult a qualified installer if additional structural support or electrical work may be required.
1. Adjustable Pin Hooks for Pinch-Pleat Curtains
Tools & Materials: Tape measure, level, pencil, ladder, screwdriver or drill, pleated curtain panels, compatible adjustable pin hooks, one ring or glider for each hook, the selected rod or track, and fasteners suitable for the mounting surface.
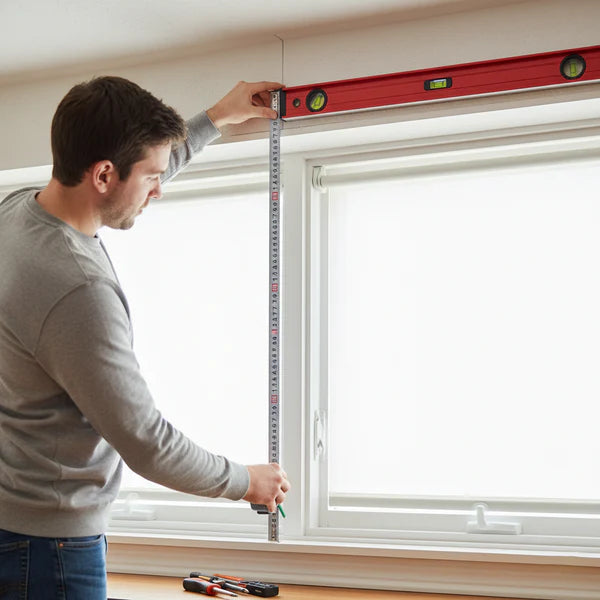
Step 1 – Measure and Mark Rod Placement
Determine the installation height from the finished curtain length, the distance from the hook attachment point to the bottom hem, and the desired floor clearance or break. Do not add a universal allowance. Mark a level line only after confirming the dimensions of the selected rod, rings, hooks, and curtain.

Step 2 – Install Brackets and Rod
Confirm that the mounting surface can support the combined weight of the rod, hardware, and curtains. Use studs or anchors rated for the surface and load, and check for concealed wiring or pipes before drilling. Position the brackets according to the rod manufacturer’s instructions, verify that they are level, then install the rod and confirm that all fasteners and locking points are secure.

Step 3 – Position the Pin Hooks
Insert one compatible adjustable pin hook at each designated pleat or reinforced header pocket without piercing the face fabric. Adjust the hook height in small increments so the panel tops and hems align. The correct insertion position depends on the header construction and hook type; do not rely on a universal insertion depth.

Step 4 – Hang Curtains on Rings
Attach each hook to a compatible ring or track glider, normally using one attachment point for each finished pleat unless the product instructions state otherwise. The finished pleated-panel width should correspond to the planned rod or track coverage. Custom pleat fullness is built into the panel and should not be recalculated as ring spacing.

Step 5 – Final Adjustments
Arrange the pleats, test that the panels move without binding, and confirm that the hardware remains level under load. Follow the product care label before removing wrinkles. If steaming is permitted, begin with a low setting and keep the steamer an appropriate distance from the fabric. Do not apply a hot iron directly to the face fabric, trim, or lining unless the care instructions allow it.
2. Four-in-One Header Options
Materials Needed: Curtain panels with a four-in-one header, the compatible curtain hooks supplied or recommended for the product, and the selected rod rings, clip rings, or curtain rod.
Compatibility Note: Available hanging methods and attachment positions depend on the construction of the specific header and the hardware selected. Confirm the supported methods on the product page or in the instructions supplied with the order.
Hook and Ring Method: Insert compatible curtain hooks into the designated reinforced pockets, adjusting the row only as permitted by the product instructions, then attach the hooks to the rod rings.
Clip Ring Method: Space compatible clip rings evenly along the reinforced header area. Avoid clipping delicate face fabric, trim, or unsupported sections of the header.
Rod Pocket Method: Feed a compatible curtain rod through the sewn rod pocket. Confirm the rod diameter and finial clearance before installation.
Back Tab Method: Feed the rod through the sewn back tabs and distribute the tabs evenly. Use this method only when back tabs are included in the selected panel construction.
3. Hanging Pleated Header Styles
Pinch Pleat / Tailored Pleat: Use the adjustable pin hooks, sewn-in hooks, or other attachment hardware specified for the selected header. Position one hook at each designated reinforced point and attach it to a compatible ring or track glider.
French Pleat / Goblet Pleat: Use the hook type and rear attachment points supplied for the product. Do not assume that every pleated header has eyelets or is compatible with metal S-hooks.
Inverted Box Pleat: Attach hooks only at the reinforced rear positions identified for the panel. Hook placement and spacing may differ from pinch-pleat construction.
Pinch Pleat with Back Tabs: Use either the compatible hook-and-ring method or the sewn back tabs when both methods are supported. Do not combine the two methods unless the product instructions specifically direct you to do so.
Pencil Pleat: Gather the header cords evenly to the required finished width and secure the cords without cutting them. Insert compatible curtain hooks evenly into the header-tape pockets and attach them to rings or track gliders. Ripple-fold carriers should be used only with a header designed for a ripple-fold system.
4. Ripple-Fold Drapery Installation
Compatibility Note: Ripple-fold curtains must be used with a compatible carrier spacing, snap tape, and track system. The supplied hardware and product-specific instructions take priority over the general sequence below.
Tools & Materials: The compatible track and carriers, mounting brackets and splices supplied for the system, fasteners suitable for the mounting surface and curtain weight, tape measure, pencil, level, drill or screwdriver, and a stable ladder.
Step 1 – Check Components: Compare the track, carriers, brackets, splices, end stops, fasteners, and curtain attachment tape with the packing list. Do not install a system with missing or damaged load-bearing parts.
Step 2 – Mark the Mounting Line: Determine the track position from the finished curtain length, the carrier-to-floor drop, and the intended floor clearance. Use the hardware dimensions supplied with the track rather than adding a universal height allowance.
Step 3 – Join Track Sections: If the track is supplied in sections, connect and align them using the specified splice hardware. Confirm that carriers can pass the joint without binding before mounting the track.
Step 4 – Install Brackets: Follow the track manufacturer’s required end distance, bracket spacing, load limits, and wall- or ceiling-mount method. Use fasteners rated for the surface and curtain weight, and add structural support where required.
Step 5 – Mount and Test the Track: Secure the track using the locking method designed for the supplied brackets. Tighten fasteners evenly without deforming the track, then test the full carrier travel before hanging the curtains.
Step 6 – Hang the Panels: Attach the curtain snaps or connectors to the carriers in the sequence shown in the product instructions. Connect master carriers, end stops, and return hardware only when those parts are included in the selected system.
Step 7 – Form the Folds: Alternate the fabric direction between carriers to establish the ripple pattern. Wave depth and spacing are determined by the carrier and snap-tape system; do not force a fixed fold size that differs from the supplied hardware.
Step 8 – Install Returns: If return hardware is included, secure the return edge using the supplied return pin, clip, or bracket. Do not substitute an unverified screw or pin through the curtain fabric.
5. Roman Shade Installation Guide
Important Compatibility Note: Bracket style, minimum mounting depth, pilot-hole size, fasteners, and headrail attachment vary by product and mounting surface. Use the hardware and product-specific instructions supplied with the shade. Do not substitute universal measurements for the specifications of the selected product.
1. Cordless Roman Shades – Inside Mount
Measure and Dry-Fit: Confirm the required recess depth on the product page or installation sheet. Place the headrail in the intended position, check clearance for handles and trim, and mark the supplied bracket locations.
Install Brackets: Check for concealed wiring or pipes, then drill pilot holes only when appropriate for the supplied fasteners and mounting material. Use anchors or structural support rated for the shade weight.
Attach the Headrail: Engage the headrail using the locking method designed for the supplied brackets. Confirm that every bracket is fully engaged and that the headrail is level before operating the shade.
Test Operation: Raise and lower the shade slowly. Stop and recheck alignment if the fabric tracks unevenly, the mechanism binds, or the brackets move under load.
2. Cordless Roman Shades – Outside Mount
Determine the required overlap, headrail clearance, and mounting height for the selected product. Mark a level mounting line and the bracket positions specified in the supplied instructions. Secure the brackets to a suitable wall, trim, or other supporting surface, attach the headrail, and test the full operating range. Outside-mount measurements and bracket positions should not be copied directly from inside-mount instructions.
3. Roman Shades with a Wooden Headrail
Use the predrilled locations and mounting hardware supplied for the wooden headrail. Attach wall- or ceiling-mount brackets to the supporting surface unless the product instructions specify a different construction. Align the headrail, tighten the supplied fasteners evenly, and avoid overtightening hardware into wood. Do not assume that every wooden headrail uses clips, wing nuts, or the same bracket sequence.
4. Corded Operating Systems
This section applies only to a compliant corded system and the exact safety devices supplied with it. Do not install or use a free-hanging operating cord that is not permitted for the product. A cord cleat is an auxiliary cord-management device; it does not eliminate strangulation risk or, by itself, establish regulatory compliance. Cordless or motorized systems should be selected where available, especially in homes where children may be present.
5. Cord and Chain Safety Devices
Free-Hanging Lift Cords: If a compliant product includes a cord cleat, install and use it exactly as directed by the manufacturer. Wrap the cord after every operation and keep it inaccessible to children. Do not describe a fixed mounting height as making the system safe.
Continuous Cord Loops and Bead Chains: Use the factory-supplied tension or hold-down device rather than a cord cleat. Mount the device to the wall or floor with fasteners appropriate for the surface, keeping the loop taut but operable. Do not remove, bypass, or replace the supplied device with an unverified part.
Child-Safety Check: Keep cribs, beds, furniture, and toys away from window-covering cords. Stop using the shade if a cord, chain, tension device, or other safety component is missing, loose, damaged, or not functioning as intended. Follow the current product labels, manufacturer instructions, and applicable safety requirements. For U.S. consumer guidance, see the CPSC window-covering cord safety guidance.
Final Check: Measure twice before drilling, confirm every fastener and safety device, and test the full travel of the curtain or shade. Product-specific instructions take priority over this general guide. For sizing assistance, see our Measurement Finder.